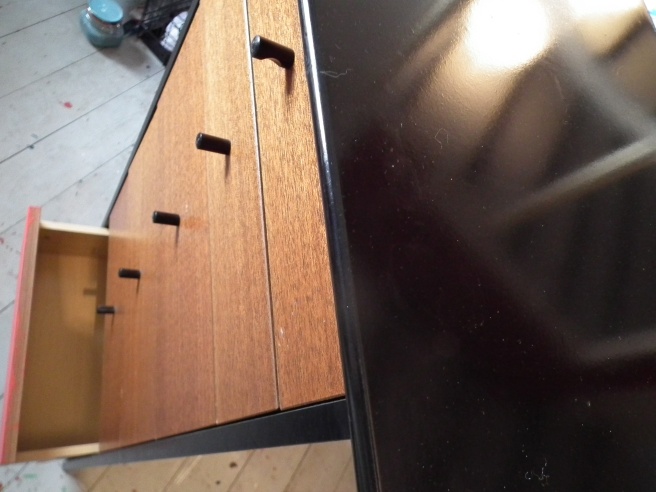
I was offered these drawers by a trader friend of mine who needed the space in her shop. She wasn’t charging me a fortune and there was something about the shape and styling in them that appealed to me. They were well made but modern and I knew straight away what I was going to do with them. Mark, on the other hand, hated them!
Great shape but very 1984!
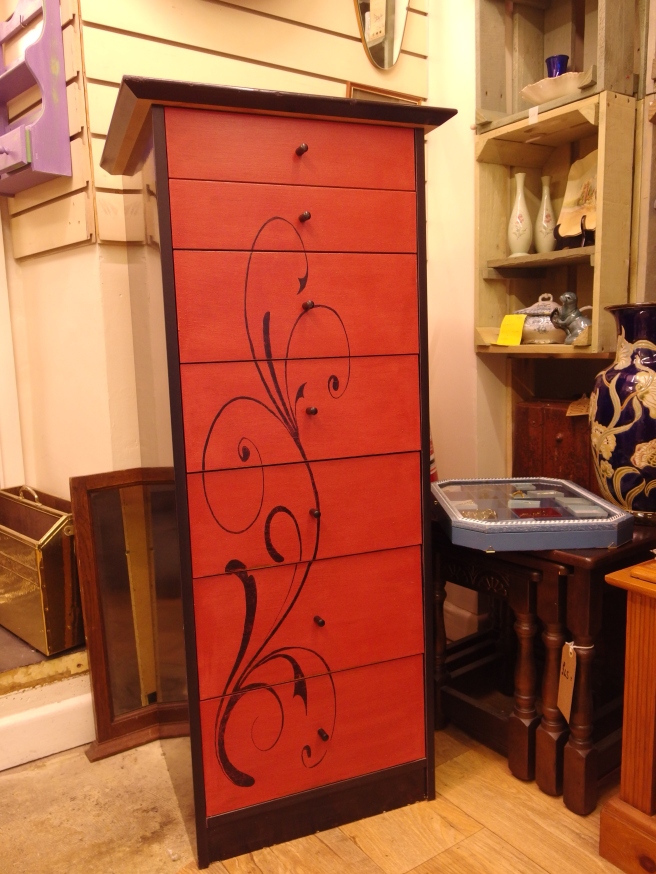
I started off with 2 coats of red chalk paint (my own mix) and then turned the laptop on and fired up Pinterest. I needed a free swirl that I could use to decorate the front and, sure enough, Pinterest delivered!
Then I turned to Block Posters to transform it into a PDF and transferred it onto the drawers (I will be writing a tutorial on the method I use in the near future). It wasn’t quite as bold as I wanted so I went over it with a Sharpie and then sanded back just a little so it wasn’t too sharp.
A quick coat of wax varnish and they were ready to stick online… only now Mark likes them and wants them down the shop!
I’ve read some great blog posts this past few weeks and thought that if I love them then you might too? Okay, you probably already subscribe to a few (if not all) of them but they are really worth checking out – if you haven’t already!
I might try to make this a regular Sunday night thing, if nobody minds?
First up is this from Ferpie and Fray. It was great to read about a transformation that all went to plan!
Loved this no hassle transformation at Ferpie and fray
This next piece is NOTHING like how I would have painted it but isn’t that part of what makes sharing great? I love how it turned out and I’m sure her client does too. See the before and after at This Delightful Life.
I always read posts from Phoenix Restoration and really love her work. This piece struck me because of the great use of colour.
Love a lot of her work!
This post from Me Myself n DIY made me laugh so hard! She talks about the 6 stages of failure we have all gone through (or something very similar) when working on that ‘pig of a project’ that comes along every so often!
This post made me laugh so hard – we’ve all been through it!
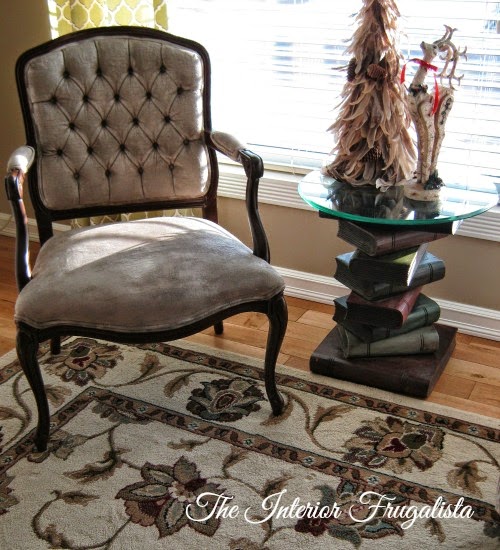
And finally… I was intrigued by this post as I have been itching to paint fabric chairs for about 6 months now and just haven’t found the right piece! See how the Interior Frugalista copes with this project on a tight schedule
I have always wanted to try this!
Of course I have read a tonne of great posts but had to set a limit and 5 seemed about right. Hope you enjoy them as much as I did!
Blogging has really helped me to keep motivated this past few weeks and the post-Christmas blues haven’t been able to take hold. It has also made me try new things (like distressing with vinegar) and revisit methods I haven’t used for a while (watch out for a post about crackle finish using pva glue).
In the hope that it can have a similar effect on Mark I am going to try to include a post once a week of what he’s been working on. Most of it shouldn’t need any explaining but, if you do have any questions, please leave a comment and I’ll answer every one.
This week has been about refinishing a cute little nest of tables. Mark loved the blue and red table I told you about not long ago, so used the same colour combo on the tables. I found a wonderful wallpaper, that looks like old books on shelves, to go under the glass that finishes them off beautifully!
You find these quite often at auctionNice legs 😉First redThen Blue…Rubbed back just a little…Add some clear waxPut your wallpaper in…Ta-da!
I really like them, but of course he based them on one of my pieces and I chose the paper so I’m going to be completely biased!
Just last week I wrote a post about an adorable little black rocking chair that we were considering painting white to go into our shop. We actually debated to and fro for a couple of days – Mark even sent me a text message after I’d been in bed for 2 hours (and was fast asleep!) asking if he should just start painting!
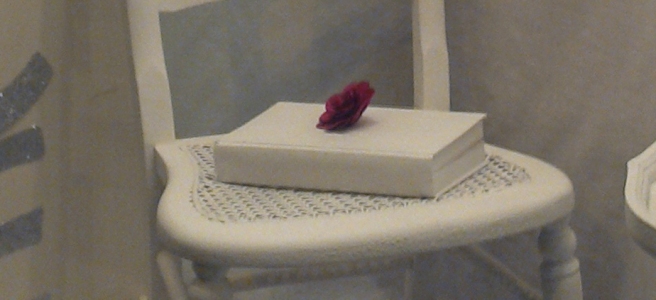
In the end we bit the bullet and went for it! We used some paint that we have developed ourselves (very exciting post about this coming soon) and gave it just 2 coats of white. Amazingly it covered really easily, although the bumpiness is even more apparent now it’s a flat white colour.
It will be P E R F E C T in the window of the shop, BUT my love for it has diminished just a little 😦 It’s no longer quirky or cute, it’s a little lacking in the character department to be honest.
The chair!
What it is, is peaceful. And if you read the original post you know that’s exactly what we were aiming for.
Sorry for the poor photos, I was having difficulty getting the camera to focus through the window and I couldn’t use the flash!
I thought I’d share a quick B & A with you this beautiful Sunday. I bought the original dark wood table from a friend who runs a house clearance and second hand store. It was a boring piece that had sat in her shop for a few months so she was pleased to see the back of it – and it fitted my shopping search for something I could complete in an afternoon and test my new paints out on.
I got carried away and started painting before I remembered to take the ‘Before’ shots!
I didn’t sand or prime it at all as I wanted a true test of the paint I’d just made up. The first coat of red went on a dream. The paint was very thick so there were brush marks in the texture but it went on well so I decided that one coat would be enough. I gave it a rudimentary clear wax (Rust-oleum) and then painted directly over that with the blue I’d just mixed up.
The blue was a LOT runnier and I was worried that it would take a few coats to cover such a strong red. Boy, was I wrong! It went on an absolute dream!!! One coat and you had no idea of it’s secret red undercoat 🙂
I like it’s simple elegance
Once it had dried I rubbed it back a little on the legs and a bit heavier around the edges and top of the table, until I got the look I was after. Another 2 coats of wax and a good polish and I was done!
I’m really pleased with the results and the finished piece is available to buy on our Showroom pages or our Lydney shop. £45
Drumroll…
I wanted the red to show through, but not too much!
It’s Saturday morning as I write this. Mark is enjoying a well deserved lie in, the kids are doing their own thing and I’m still in my pj’s with a nice cup of coffee and a plate of shortbread! I’ve just given a little table it’s first coat of red paint and, while I’m waiting for it to dry, I thought I’d share some photo’s of a dresser that Mark has been working on for a couple of weeks.
It was very ‘bog standard’ when he bought it at auction, but he had a vision of what he wanted and set about it fearlessly. He started with Annie Sloan (TM) Barcelona Orange straight onto the varnished surface, force dried it with a hair drier (he’s not a patient man), then over the top with Antibes Green.
It was heavily sanded back to emphasize the distressed look and then given 2 coats of dark wax and polished within an inch of it’s life! We used Briwax as we like the way it actually takes off a little of the chalk paint as you use it and takes out any sanding marks you might leave.
With the top, Mark sanded off most of the varnish before aging the wood to a beautiful silver. Unfortunately he hadn’t removed quite enough of the varnish (like I said, he’s not a patient man) and the effect was patchy, but he gave it the dark wax treatment and it actually turned out great!
I’d love to hear your comments on the finished piece – I think it might be our marmite dresser (love it or loath it!).
Now for some pics…
The whole thing started out as bog standard varnished pine.Tools of the tradeBarcelona OrangeGreen over orangeRubbed backDark Wax Going OnForce drying can cause paint to crackle (Tut coming soon)Repeat everywhere!The top before dark wax
I fell onto this blog post accidently while trawling for something else, but I’m so glad I did! I always feel like a bit of a cheat just showing you someone else’s blog but I figure that if you like mine, then you might like blogs I like!
I am having a MAJOR meltdown over this project. Mark asked me to help design the Christmas window for the shop – a great honour as he can be a little ‘precious’ about the shop as I don’t work there anymore. (Don’t get me wrong, I have input but I don’t physically stand in the shop all day)
Anyway… The town’s ‘theme’ for windows this year is ‘PEACE’, and straight away I knew what I wanted to do…
I wanted a beautiful little townscape made from paper to frame the window. It would have looked a bit like this…
… but I’m told there may be a problem with condensation as it gets colder here in the run up to Christmas. Okay, I put that idea on hold and move onto the main display.
We are lucky to have a full height window in the shop, but it isn’t huge, and anything we put into a display is actually eating into shop floor space so it’s a bit of a balancing act. I close my eyes and think of ‘PEACE’… but that just conjures up images of tropical beaches and the sea lapping at my toes! So we pull out the old whiteboard and start brainstorming.
Eventually it hits me. Peace is quiet, uncluttered, tranquil, restful… no wonder it took me so long to come up with the idea – these things are all completely alien to my life right now! My vision for the window display is finally taking shape.
I want everything white. The walls, the backdrop, the floor. Then a little wine table that has been kicking around for a while, waiting to be reloved. Then a wine glass to sit on it. Then an adorable little candelabra Then a book. And a chair…
And BOOM there’s my problem! We have the perfect chair, it’s a tiny little rocking chair. It’s quirky and cute, pretty and functional. We’ve had it for a few months in the shop, always being passed over for another piece.
Our little rocking chair is black, with pretty little flowers hand painted onto it. There’s something really strange about the finish to it – it’s sort of ‘bumpy’ and we have no idea why. I’ve often thought it would look wonderful beside a log burner on a canal boat. Or in the corner of a bedroom. Or just about anywhere!
Perfect for a canal boat?
So Marks says ‘Paint it white then’, but neither of us reach for the brush. We took it to our house an stood it in the middle of the living-room floor. And still neither of us could start the paint job. We don’t want to keep it for ourselves but we don’t want to write it off either. What we want is for someone to love it as much as we do and to take it home with them!
We need a little chair. We’ve got the perfect little chair. We need to cover it’s quirkiness with white chalk paint to finish our window display for Christmas. Oh why is this so difficult?
I think we will end up painting it and it will be a stunning display. But it feels like we’re making the perfect roast dinner out of our pet chicken. It just doesn’t sit right for some reason.
I found this lovely furniture transformation online today and just had to share it with you. Have a good look around her blog, it’s full of fantastic information and interesting projects!
Firstly let me say that this isn’t a proper tutorial. There’s no step by step detailed instructions, I can’t remember exactly what paints I used, and the photos aren’t the best either. (I’m really selling this post, eh?) That said, I wanted to share one of the first commission pieces we got into the shop.
It was from a couple who turned into a very loyal customers and, have since put a lot of business our way.
Mrs M. called in one day with a rather sorry looking kidney shaped table…
Mrs M’s Table
As you can see, the top is badly scratched and stained. What you can’t see is that one leg was hanging off!
Loose joints make for wonky tables!
But there was some beautiful detailing…
Heaps of potential there
So we set about gluing, clamping and making it stable.
Some strong glue and long clamps
Then we gave it a couple of coats of Craig & Rose in a rich cream shade.
After a generous covering of Annie Sloan’s Soft Clear Wax we rubbed it back on those beautiful legs.
Lightly distressed details
Maybe you have a piece of furniture just begging to be loved back to life? Look at it in a different light and give it a go! I’d love to see what you come up with.
Myself and Caractacus trying to achieve the same as every other British couple who have upped sticks and moved to France in an effort to recreate the good life.So far it has been more Victor Meldrew than Felicity Kendal, but we are still here, still trying our best, and sometimes succeeding but in a roundabout sort of way